
Overview
The Faculty Directory is an online public resource that lists our faculty members’ biographies and contact information. This includes both full-time and part-time faculty (i.e. lecturers, adjunct instructors, etc.). This directory consists of two parts:
- Faculty Listing: The main filterable directory consists of basic faculty member listings pulled automatically based on a faculty member’s active status in our central database, Campus Solutions. The listings include name, title, school and email. No manual action is needed for these to appear on the site.
- Faculty Profile Page: These pages are created manually and allow for the presentation of deeper bio information per faculty member. These pages are linked from the faculty listings noted above. They are created and maintained through the Modern Campus Content Management System (CMS), but also pull information from Campus Solutions, an Expertise database, and the Annual Faculty Report system. These pages are maintained by specifically-trained individuals in each school (listed below).
PLEASE NOTE: Schools/Colleges must create these faculty bio pages in Modern Campus for their new faculty. As soon as a faculty member is hired and a record is created in Campus Solutions with an active status, they will begin appearing in the main listing, but they will not have a link to their own page or a photo until the school representative sets up a faculty bio page.
Faculty Directory Information Breakdown
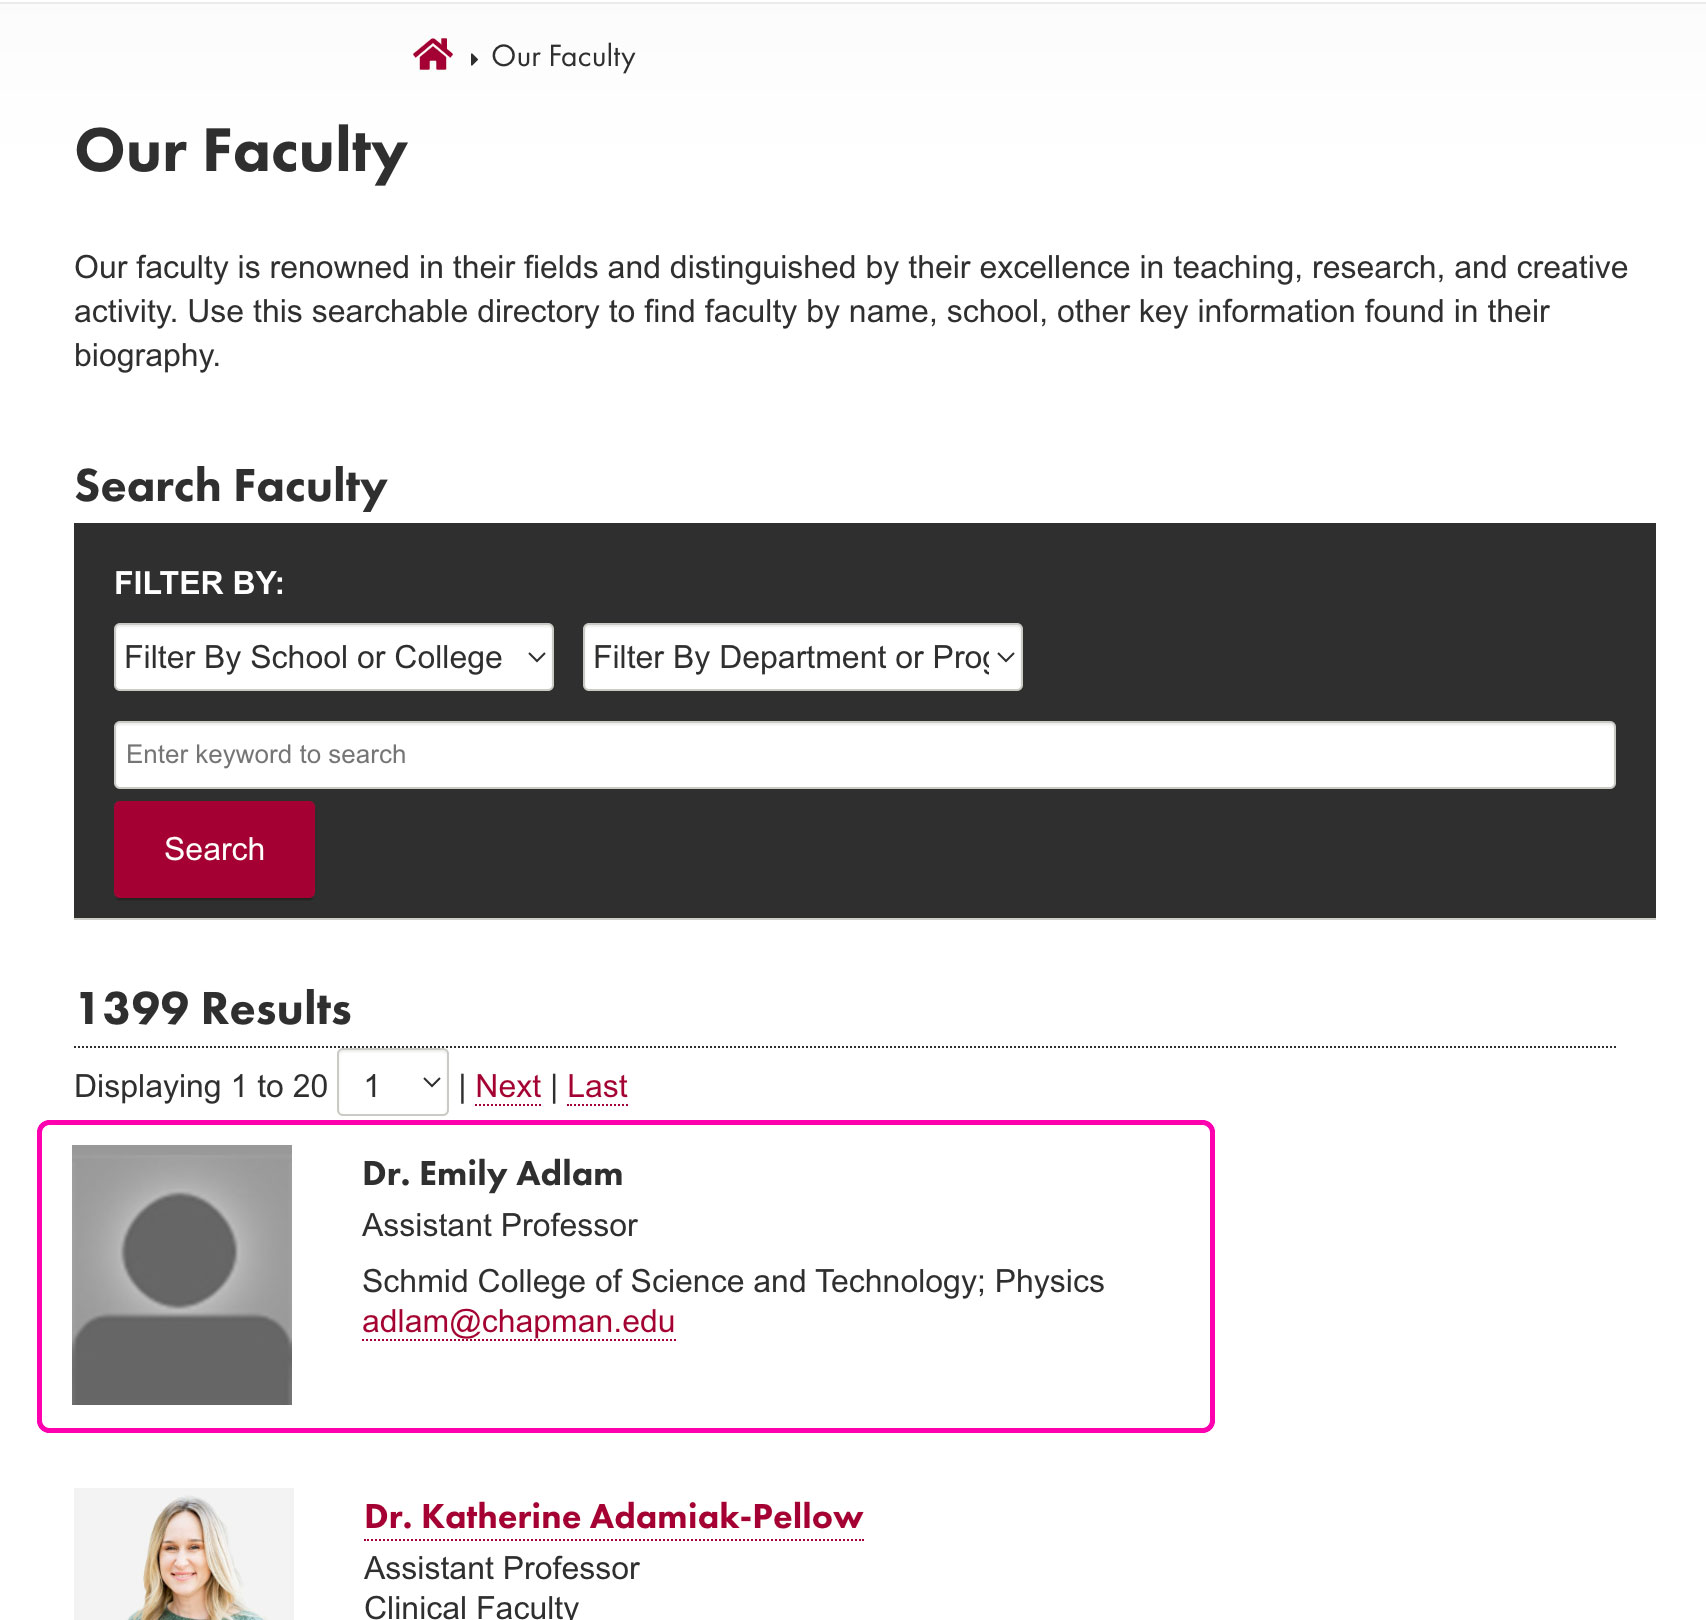
Faculty Listing (from Campus Solutions)
This is the information that is displayed in the main filterable directory page. It pulls automatically based on the faculty member’s active status.
- Name
- Title
- Core School/College they teach in
NOTE: Bio photos do not appear until the manual bio page is created.
Please work with the Office of Faculty Advancement to update this information in Campus Solutions.
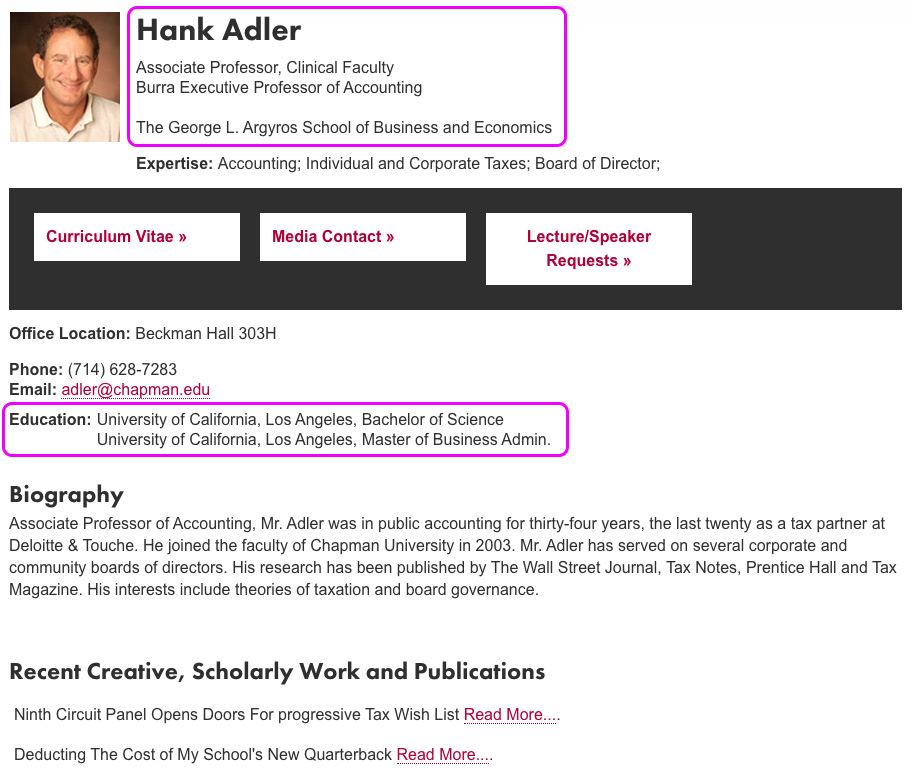
Core Faculty Bio Information (from Campus Solutions)
The following information is pulled directly from our central account records in Campus Solutions.
- Name
- Rank and Additional Title(s)
- Schools/Colleges and Departments they teach in
- Degrees (currently not displaying for part-time faculty)
Please work with the Office of Faculty Advancement to update this information in Campus Solutions.
Expertise Keywords (from IS&T-managed database)
This information is pulled from a database updated by IS&T. Please follow the below process to request updates.
- Gather no more than six key phrases that showcase the faculty member’s field of expertise (should be short phrases).
- Get written approval by the dean of their school for these keywords to be used on their bio.
- Send the approval and the keywords to the Service Desk at servicedesk@chapman.edu and copy Ramiro Landeros at landeros@chapman.edu in IS&T to update the database.
If you have questions on the process, please reach out to the SMC Digital Marketing Team at digitalmarketing@chapman.edu.

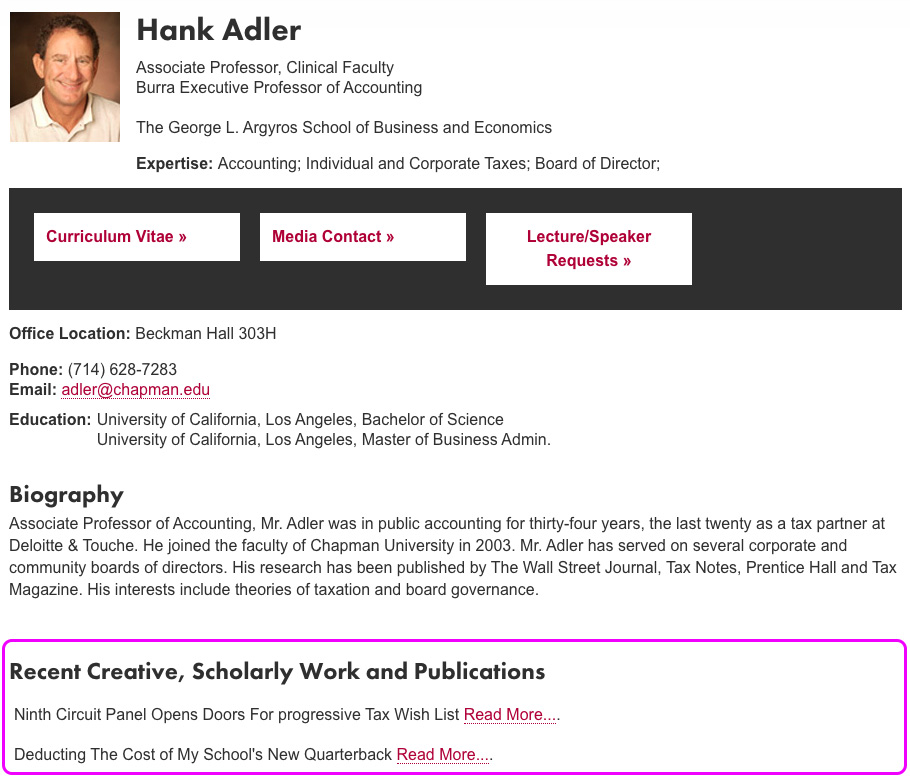
Scholarly Work / Publications (from Annual Faculty Report)
A list of faculty-published works is pulled to the scholarly works section of the faculty bio page. This information is inputted into the Annual Faculty Report on a yearly basis.
NOTE: Since updating of this information is done on a yearly basis, you can use the manual bio area of the faculty bio page to highlight selected works and new additions.
Please work with the Office of Faculty Advancement to update this information.
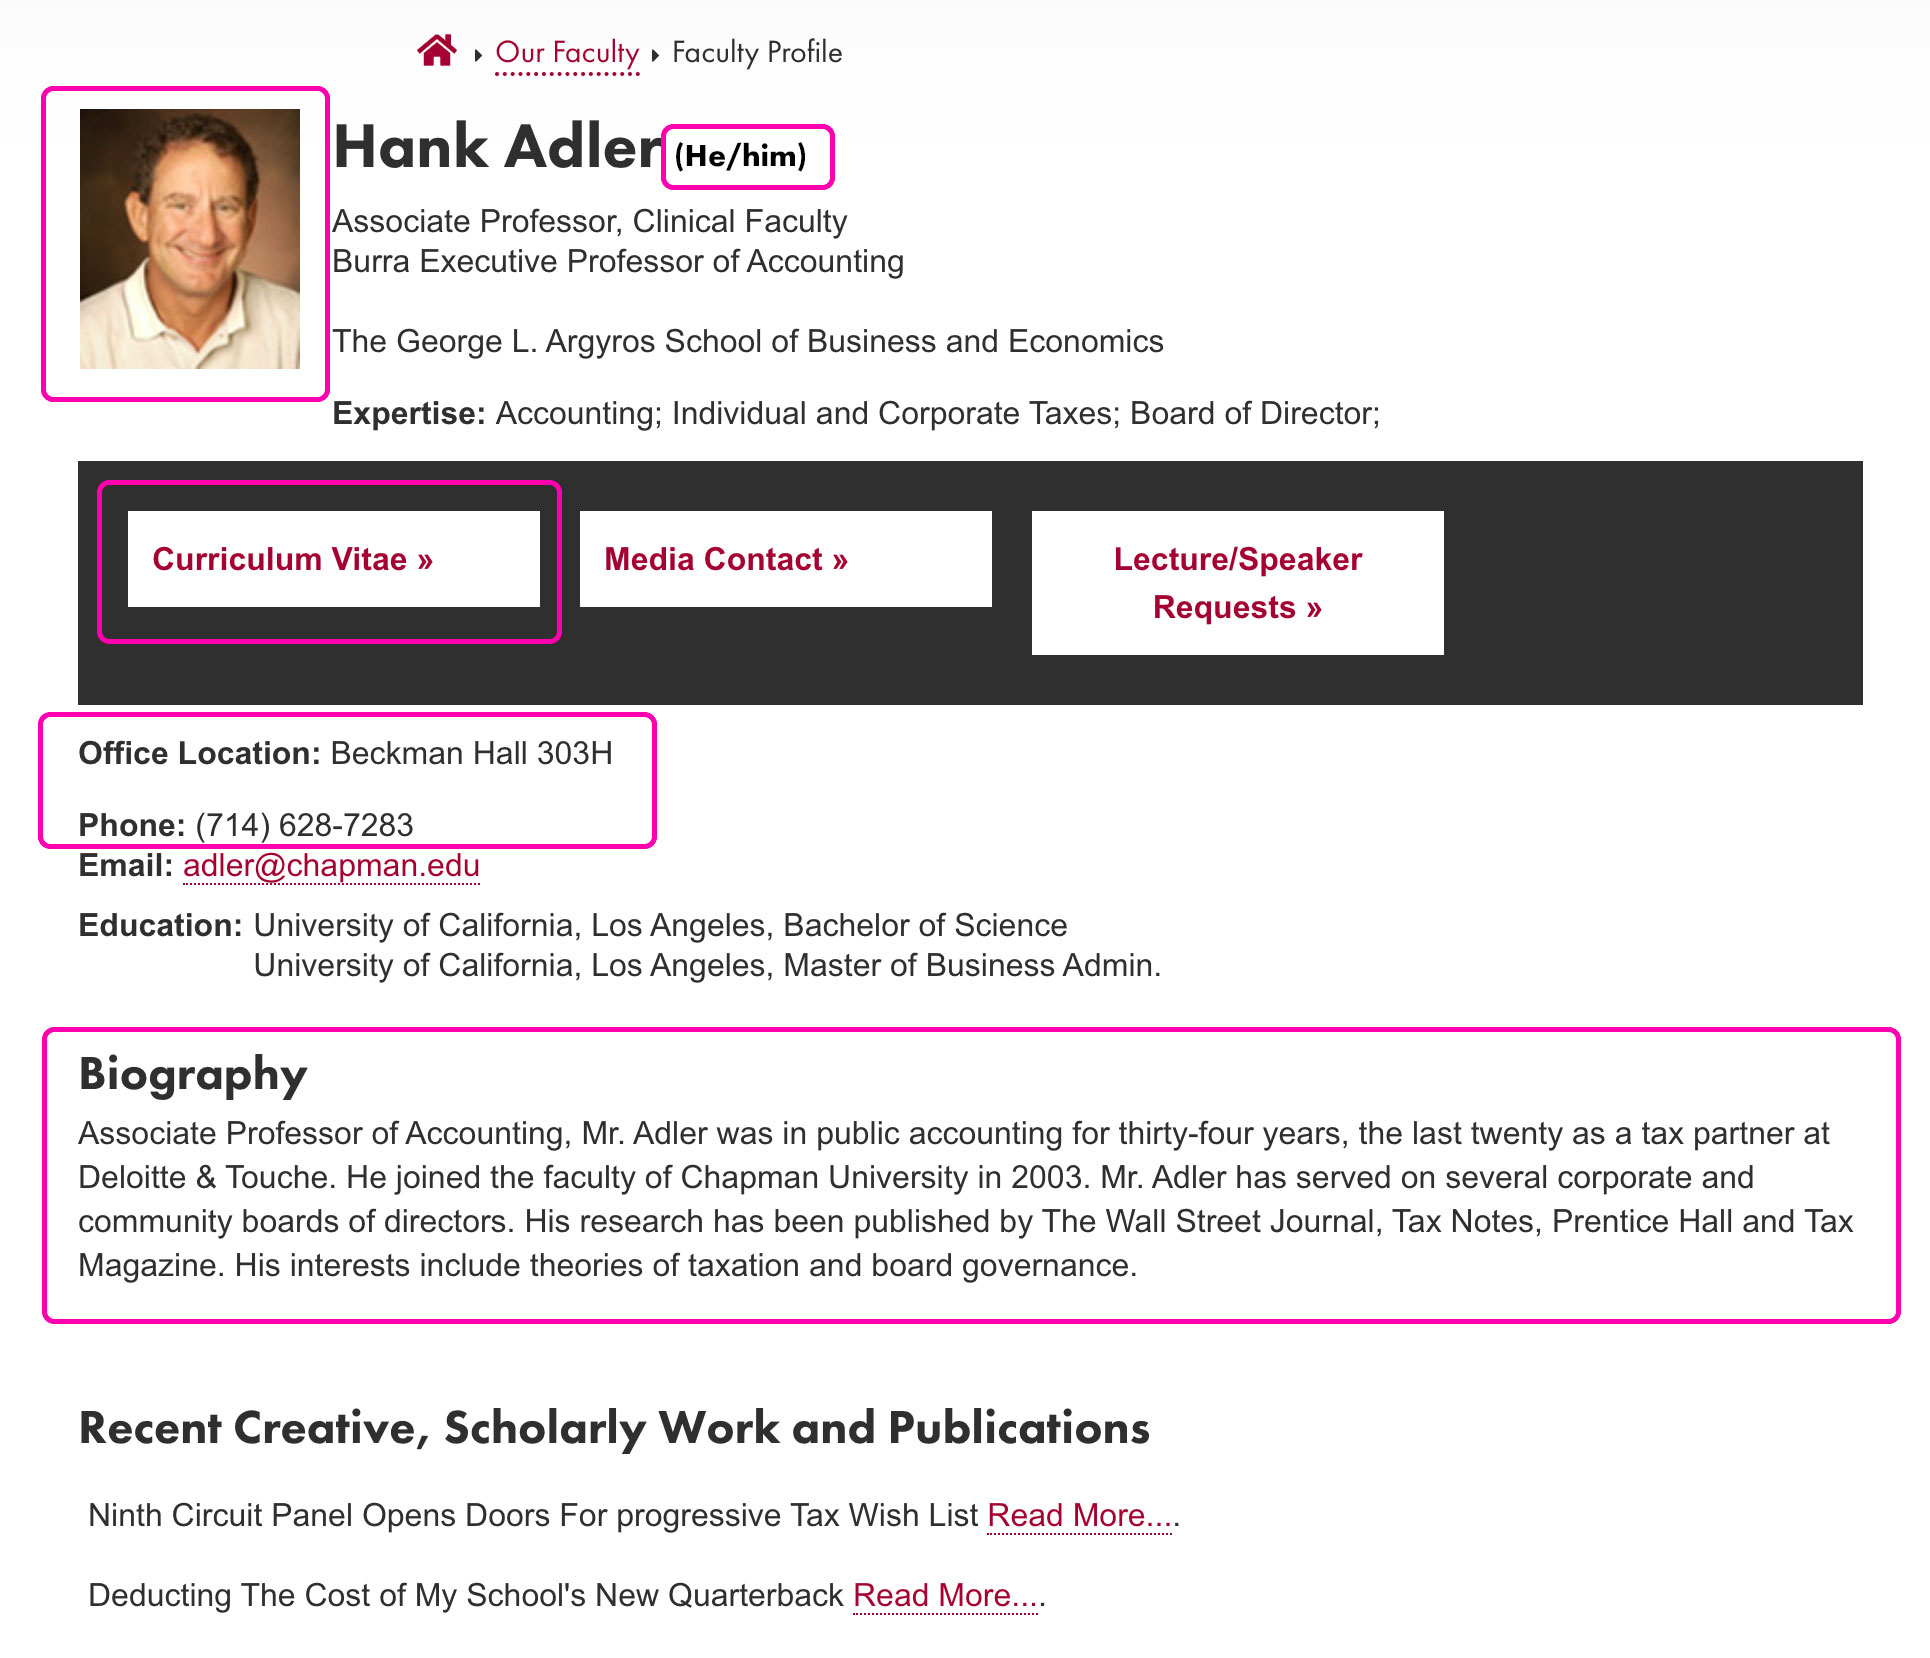
Additional Bio and Location Information (from Modern Campus CMS)
Once a profile page has been created within CMS, the school representative has access to edit these fields:
- Pronouns
- Listing/Profile Photo
- Bio Paragraphs (biography, teaching and research interests, courses taught)
- Website Link
- Office Location
- Office Hours
- Office Phone
- Specialty Discipline
- Video
- Curriculum Vitae Link
- Scholarly Work Link (to sources like Google)
- Publications Link
Additional titles or variations from what pre-populates from Campus Solutions requires approval from the Office of Faculty Advancement.
Policy and Guidelines
The faculty directory does not have specific guidelines but content should follow:
Expectations:
- Update your faculty bio pages at least once a year.
- Refrain from using the page as a dumping grounds for all bio information. Be succinct yet informative. Think of it as a faculty member’s bio pitch for media.
- Represent the faculty member’s current self, including in the photography you use.
- Keep content Chapman relevant. This is not a personal website.
Training and Access
Only web contributors with Modern Campus CMS training and approved access to the faculty directory folder “/our-faculty” can add and edit individual bios for faculty members. We limit this group to a few trained individuals within each school and college. These individuals work with faculty members to update their bio pages.
If you are the designated individual in your school or college, please work with the SMC Digital Marketing Team at digitalmarketing@chapman.edu to get trained and set up to update.
Here is a list of current faculty directory updaters to work with:
- Argyros College – Emily Bennett – ebennett@chapman.edu
- Attallah College – Ronda Kalaji – kalaji@chapman.edu
- Crean College – Jill Cagle – jcagle@chapman.edu
- Dodge College – Noela Hueso – hueso@chapman.edu
- College of Performing Arts – Jasmine Nicholson – janicholson@chapman.edu
- Fowler Engineering – Olivia Venegas-Kalaw – venegaskalaw@chapman.edu
- Fowler School of Law – Deane Sutic – sutic@chapman.edu
- Schmid College – Alyssa Castanon – alycastanon@chapman.edu
- School of Communication – Carmen Chavez – carmchavez@chapman.edu
- School of Pharmacy – Lauryn Magga – magga@chapman.edu
- Wilkinson College – Laura Silva – lsilva@chapman.edu
Guides and Resources
Frequently Asked Questions
Q. Can you make bio profiles for part-time faculty (adjuncts, lecturers, etc.)?
A. Yes, if they are an active member of the Chapman faculty, full-time or part-time, they will show in the Faculty Directory and have the option for a bio page.
Q. How do you link to a faculty directory page from another page?
A. Faculty pages are handled like external links. Navigate to the public facing page to grab the desired URLs. You can then use the external link feature within the CMS to link to the bio page.
Support Pathways
- For questions about Modern Campus CMS, contact Michael Khuraibet at mkhuraibet@chapman.edu.
- For questions on updates to information in Campus Solutions or the Faculty Annual Report, contact the Office of Faculty Advancement.
- For questions on updating the “expertise” database, contact servicedesk@chapman.edu.